Installation
Before installing the CLI client for Orchestra Manager make sure you have the Orchestra Manager app and have App Admin role for it. See Quick Start Guide.
Depending on your operating system choose the instructions:
Video Tutorial
Linux
System requirements:
tar
curl
python3
have to be installed in system.
Install Orchestra CLI:
$ curl https://content.cthings.co/static/orchestracli/ocli-install.sh | bash -
You can now verify the installation by logging in:
Launch orchestra by typing ocli, help message should appear.
$ ocli
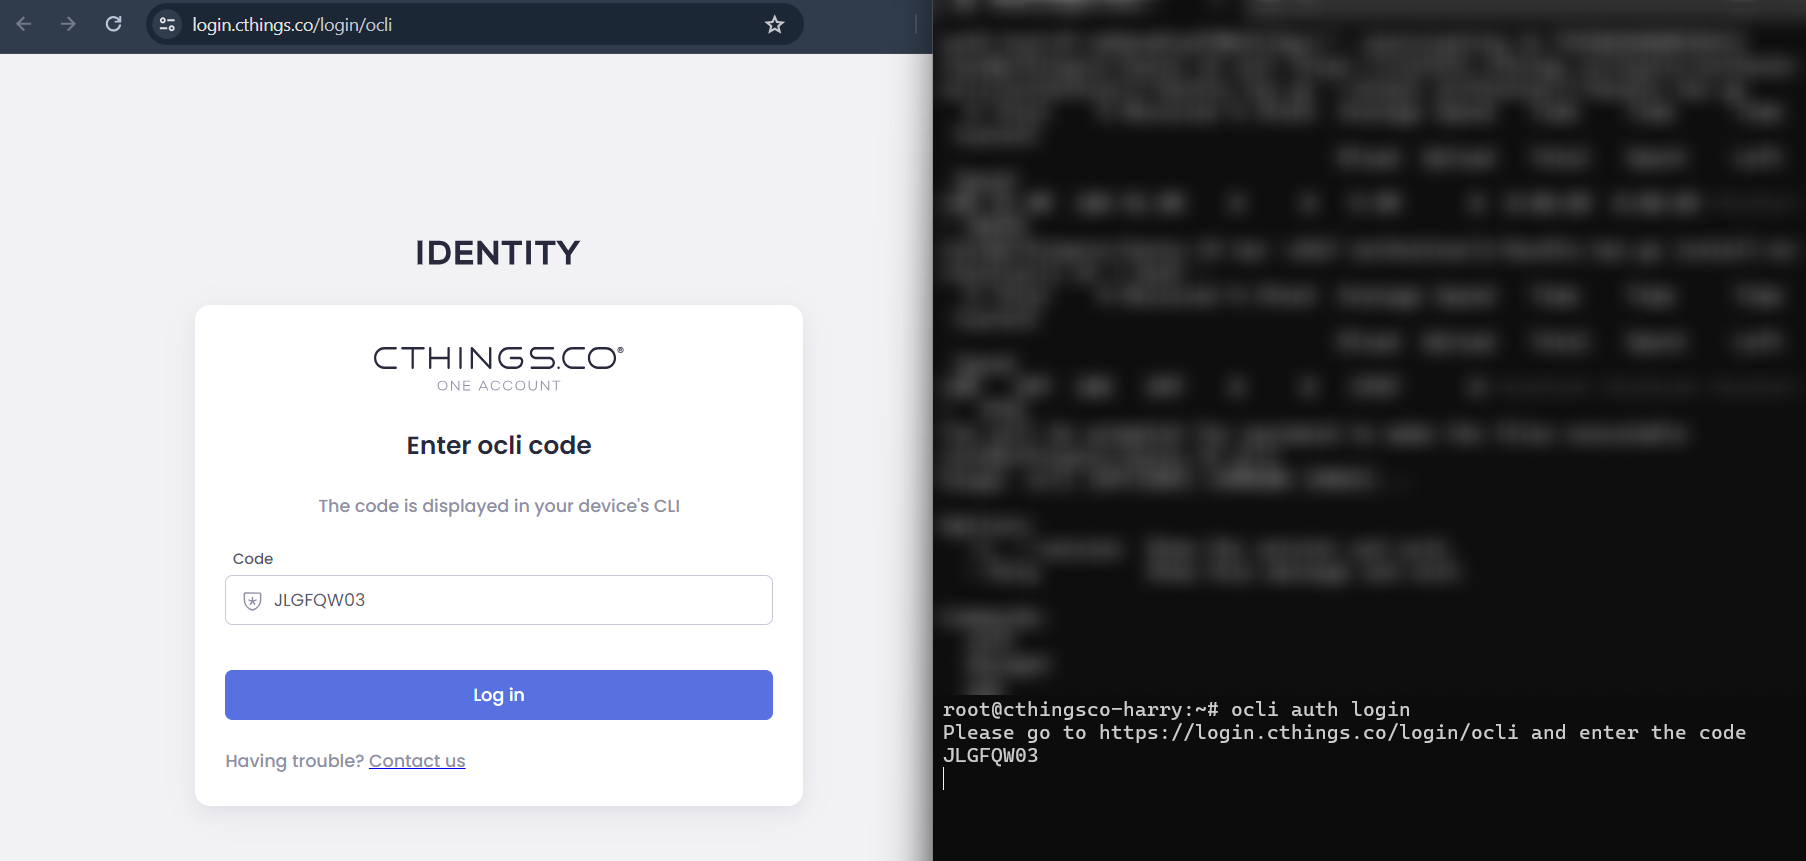
Log in by typing ocli auth login and following the instructions in your terminal.
$ ocli auth login
Paste the link to your web browser and enter the code provided in the terminal.
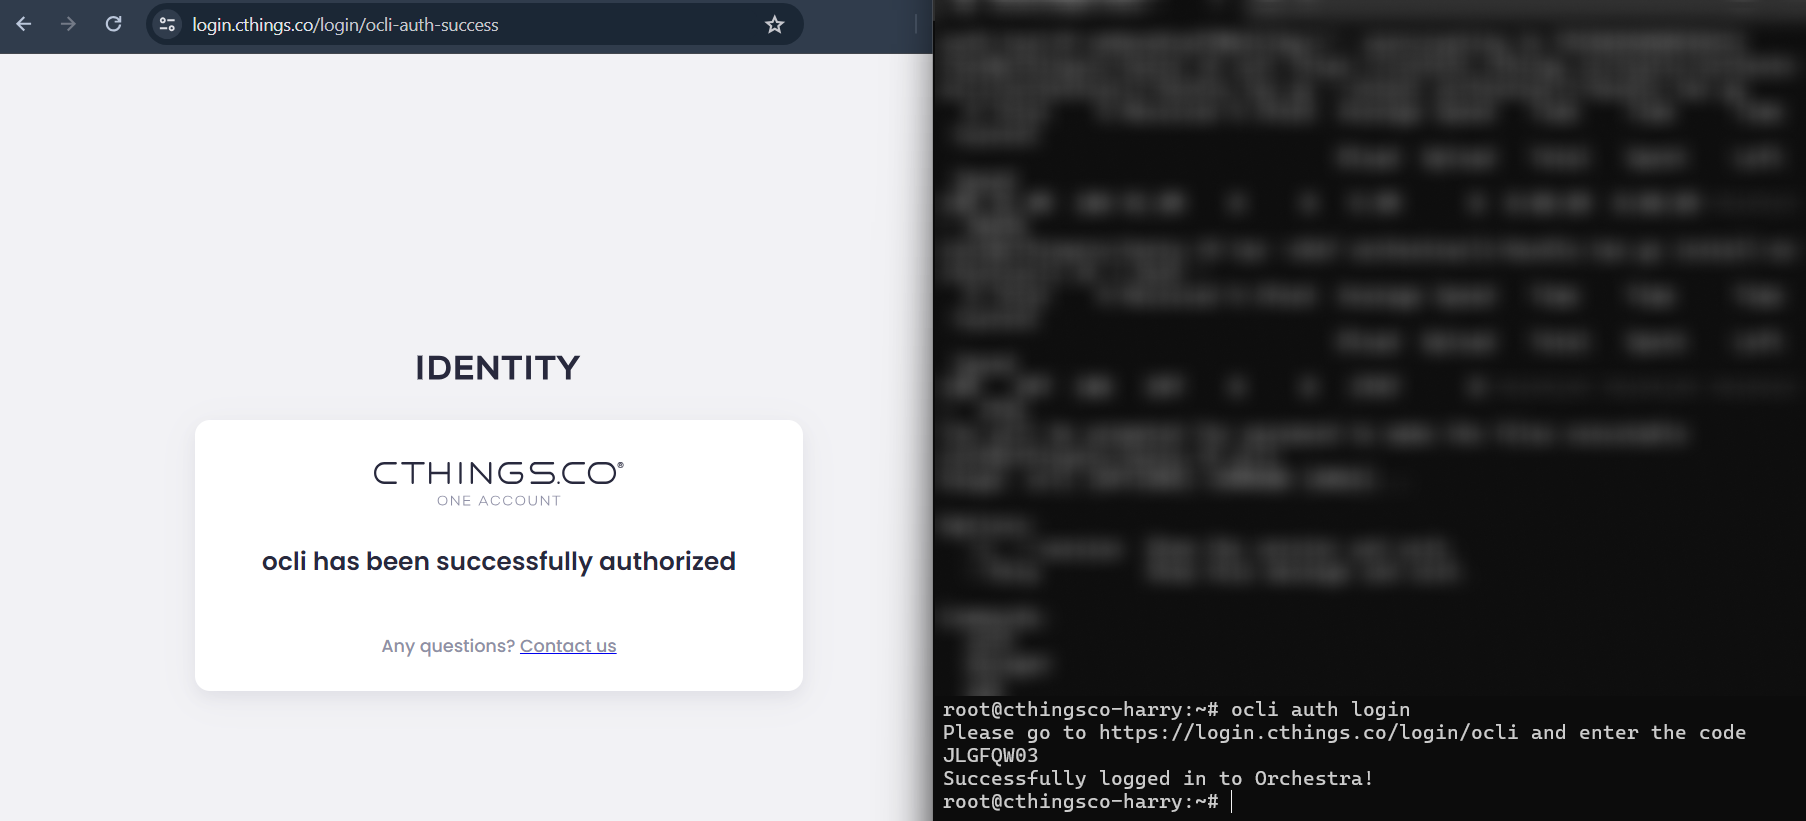
The successful authorization message will be displayed both in the browser and in the terminal.
Windows (WSL)
Preffered way of installing OCLI in Windows is via WSL.
You need to have Windows Subsystem for Linux (WSL) installed.
If you do not have WSL installed, please follow these steps to set it up:
Open the Windows Start menu and type “PowerShell”.
Right-click on Windows PowerShell and select “Run as administrator”.
In the PowerShell window, enter the following command to enable WSL:
wsl --install -d Ubuntu
Restart your computer if prompted.
Detailed instructions
Please refer to the official Microsoft guide.
Once WSL is installed, you can proceed with the installation of the Orchestra CLI using the Linux guide.
Windows (native)
Native support of Windows CLI is in development. Preferred way of installing OCLI in Windows is via WSL (Windows (WSL)).
Install Orchestra CLI:
Download: https://content.cthings.co/static/orchestracli/orchestracli-setup.exe
Allow the application to run:
Depends of the antivirus software you are using, you may need to allow the application to run (create a firewall rule).
You can now verify the installation by logging in:
Launch orchestra by typing ocli, help message should appear.
$ ocli
MacOS
MacOS version is available in Alpha version - contact support at support@cthings.co to gain access.
Common problems
tcgetpgrp failed: Not a tty
If you are running WSL and see the warning tcgetpgrp failed: Not a tty - don’t worry, it is coming from the default package wslu but it does not disturb the proper auth flow. The problem is further described here.